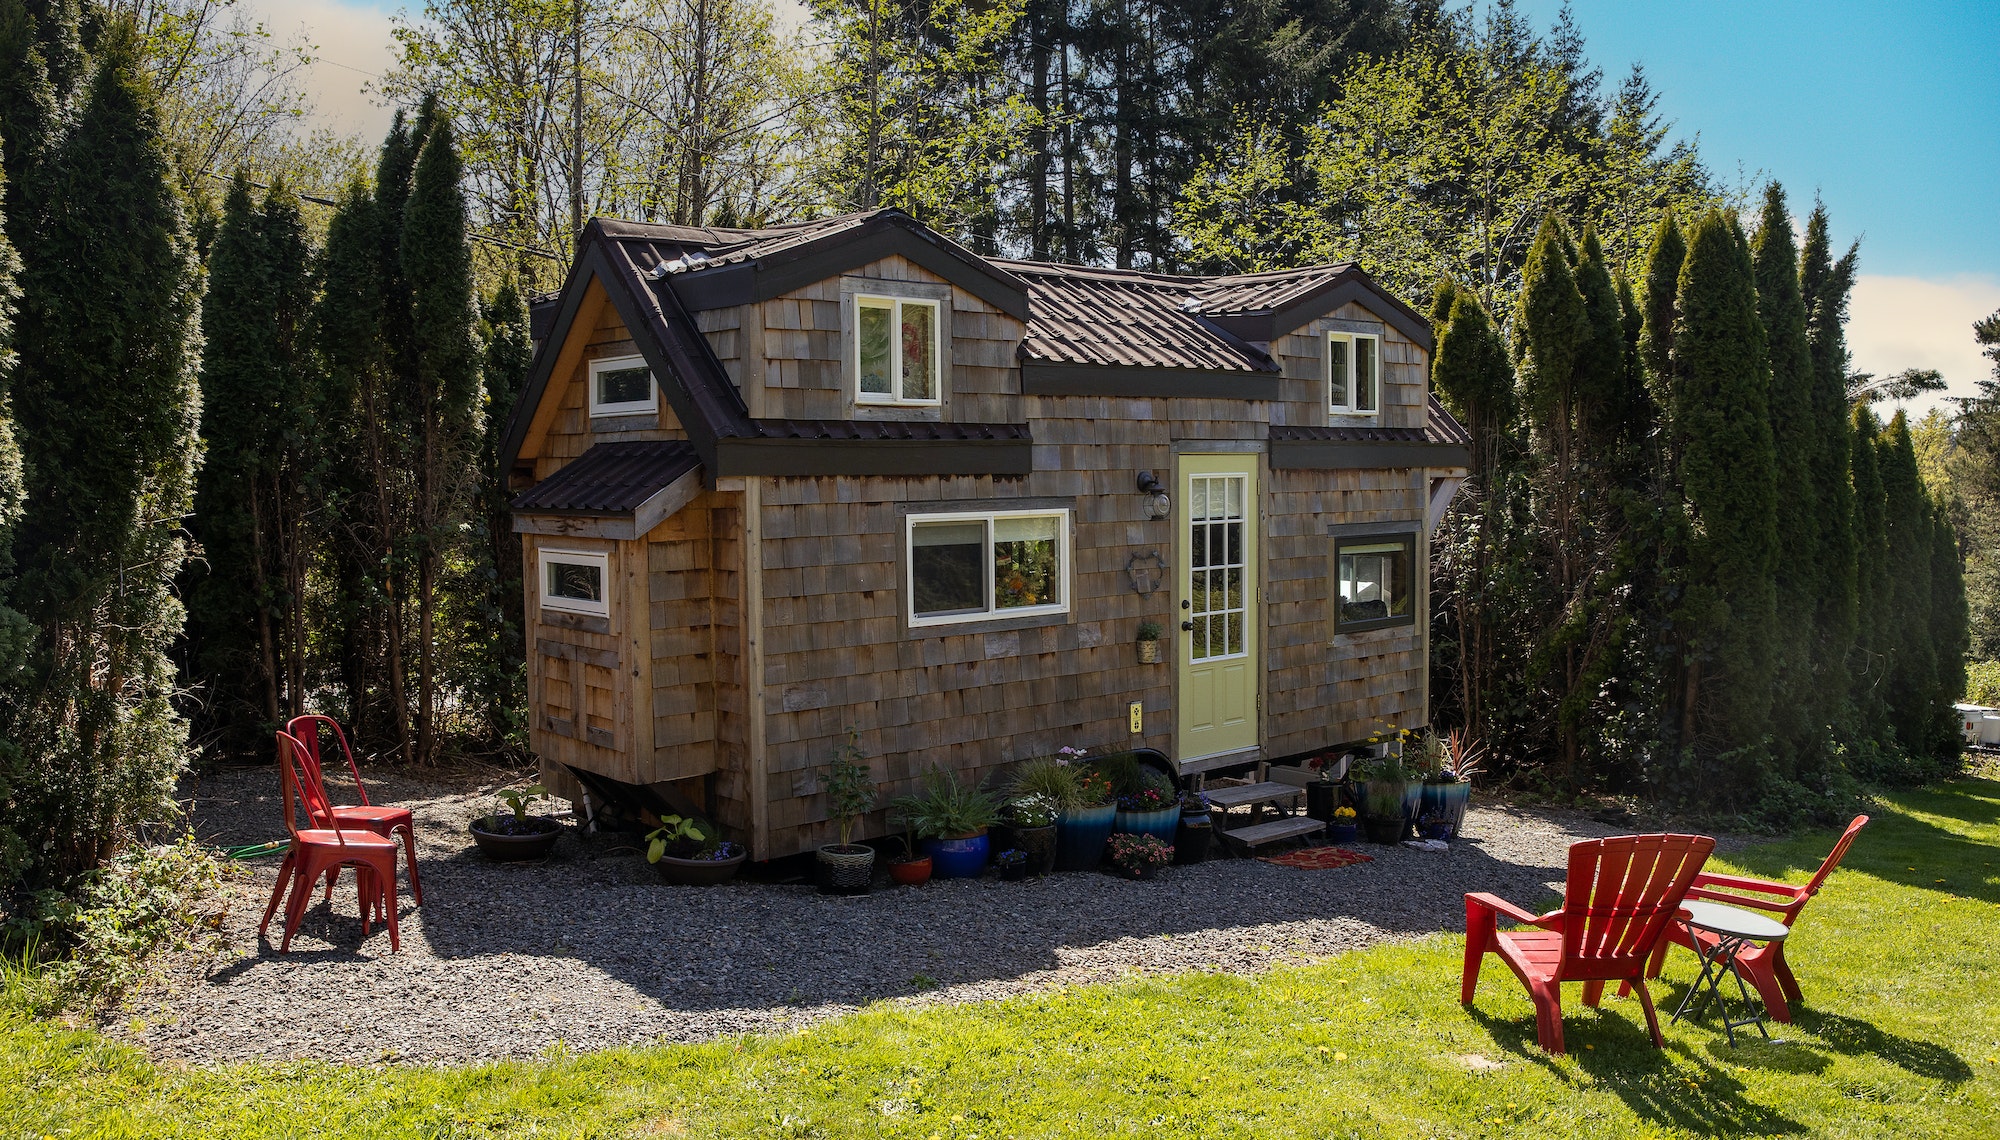
Have you ever dreamed of living a simpler, more minimalist lifestyle? If so, you’re not alone. Over the past few years, more and more people have become interested in downsizing their lives, reducing their environmental impact, and embracing the world of tiny houses. In this article, I’ll share my personal journey on how to build a tiny house and offer some insights to help you achieve your own dream of minimalist living.
As someone who has always been passionate about living simply and sustainably, I was instantly drawn to the idea of a tiny house. After much research, I decided to take the plunge and build my own little slice of paradise. The process was both challenging and incredibly rewarding, and I am excited to share my experience with you.
This article will guide you through the 7 easy steps to building your very own tiny house. We’ll cover everything from planning to construction, ensuring you have all the information you need to create a beautiful, functional, and environmentally friendly home.
Table of Contents
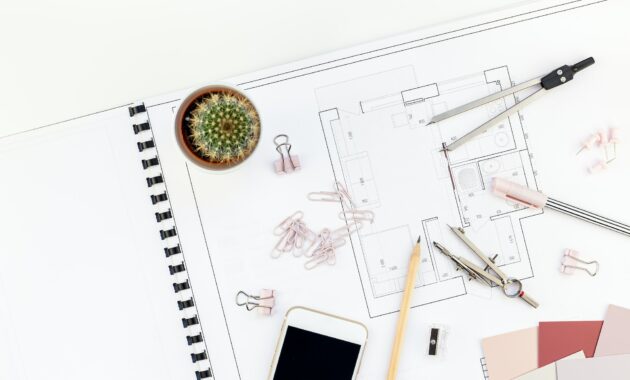
1. How to Build a Tiny House: Planning and Design
Determine your needs and priorities: Before diving into the design, take some time to assess your lifestyle and determine what is essential for you in a living space. Consider factors such as the number of occupants, desired amenities, and specific needs for storage, cooking, and sleeping arrangements.
Create a budget
Creating a budget for your tiny house project is essential to ensure you can complete it within your financial means. A minimal budget will require careful consideration of materials, labor, and design choices. Keep in mind that costs can vary significantly depending on factors such as location, size, and complexity of the project. Here are some rough estimates to help you understand the expenses involved:
- Materials: The cost of building materials can range from $25 to $50 per square foot for a basic tiny house. For a minimal budget, consider using reclaimed or repurposed materials, which can save you money and provide a unique look. The most expensive materials typically include roofing, siding, insulation, and windows. Additionally, appliances, fixtures, and finishes can vary greatly in price, so it’s essential to prioritize your needs and shop around for the best deals.
- Labor: If you have the skills and time to build your tiny house yourself, you can save a significant amount on labor costs. However, if you need to hire professionals, labor costs can range from $20 to $50 per hour, depending on the expertise required. For a minimal budget, consider doing some of the work yourself and only hiring professionals for specialized tasks, such as plumbing and electrical installations.
- Trailer/Foundation: Depending on whether you’re building a tiny house on wheels or a permanent foundation, the cost of a trailer or foundation can range from $3,000 to $10,000. For a minimal budget, look for used trailers or consider alternative foundation options, such as pier foundations, which can be more cost-effective.
- Permits and Inspections: Depending on your location, you may need to obtain permits and undergo inspections for your tiny house project. The costs for permits and inspections can vary from a few hundred dollars to several thousand dollars. Research your local building codes and regulations to understand the requirements and associated costs.
- Miscellaneous Expenses: Don’t forget to factor in additional expenses, such as utility connections, landscaping, and contingencies for unexpected costs. These can add up, so make sure to allocate a portion of your budget for these items.
In summary, a minimal budget tiny house project can cost between $15,000 to $30,000 or more, depending on various factors. The most expensive costs typically involve materials and labor. To minimize expenses, consider using reclaimed materials, performing some labor yourself, and carefully prioritizing your needs and wants.
Choose the right location
Selecting the ideal location for your tiny house is crucial to ensure that it meets your needs, preferences, and legal requirements. There are several factors to consider when choosing the right location:
- Zoning and Building Codes: It’s essential to research local zoning laws and building codes in your desired area, as they can significantly impact where you’re allowed to build and what type of tiny house you can construct. Some areas may have restrictions on minimum square footage, foundation types, or utility hookups. Make sure you understand these regulations and choose a location that complies with them.
- Access to Utilities: Consider the availability of utilities such as electricity, water, and sewage in your desired location. If you’re planning to build a tiny house on a permanent foundation, you may need to connect to municipal utilities or invest in alternative solutions, such as solar panels or a well. Tiny houses on wheels may require access to RV hookups for water and electricity.
- Climate and Environment: The local climate and environment can have a significant impact on your tiny house’s design, materials, and energy efficiency. For example, if you’re building in a colder climate, you’ll need to ensure proper insulation and heating systems. Additionally, consider factors such as sunlight exposure, flood risk, and proximity to natural resources or hazards.
- Privacy and Neighbors: Consider the level of privacy you desire and the potential impact of your tiny house on neighboring properties. Some people prefer more remote locations for greater privacy, while others may want to be closer to a community or urban amenities. Be mindful of local community guidelines or homeowners’ association rules that could affect your tiny house project.
- Accessibility and Transportation: Evaluate the accessibility of your desired location, taking into account factors such as road access, proximity to public transportation, and distance to essential services such as grocery stores, schools, and medical facilities. Depending on your lifestyle and needs, you may want to prioritize easy access to urban centers or recreational areas.
- Land Ownership and Cost: Land ownership can play a significant role in the overall cost of your tiny house project. Consider whether you want to purchase land, lease it, or build on a family member’s or friend’s property. Research land prices in your desired area and factor this expense into your budget.
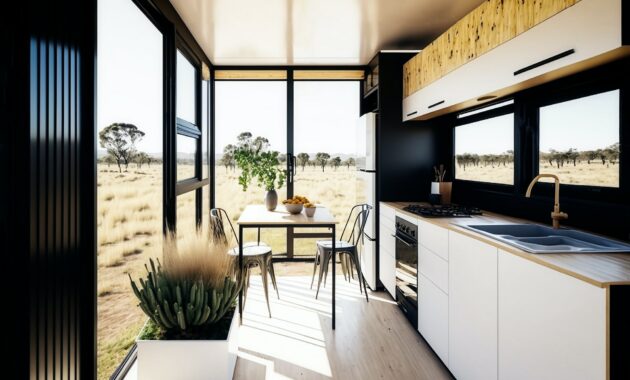
Design your tiny house layout
When designing the layout of your tiny house, it’s essential to consider both functionality and aesthetics. With a minimal size, you’ll need to make the most of every inch of space while still creating a comfortable and inviting living area. Here are some tips for designing a tiny house layout with a minimal size:
- Size Constraints: The size of your tiny house will largely depend on your needs, preferences, and any legal restrictions in your area. A minimal size for a tiny house could be anywhere from 100 to 400 square feet. Keep in mind that smaller spaces will require more creative design solutions to maximize functionality.
- Prioritize Your Needs: When working with limited square footage, it’s essential to prioritize your needs and decide what elements are most important to you. This could include a dedicated sleeping area, a small kitchen, a bathroom with a shower, or a workspace. Consider integrating space-saving solutions like a Saniplus toilet. Focus on incorporating these essentials into your design, and be prepared to compromise in other areas.
- Multi-Functionality: Look for ways to create multi-functional spaces and furniture. For example, a fold-out sofa bed can serve as both a seating area and a sleeping space, while a fold-down table can function as a dining area, workspace, or additional counter space. This will help you maximize the usability of your limited space.
- Vertical Space: When designing a minimal size tiny house, don’t forget to make use of vertical space. Incorporate lofted sleeping areas, wall-mounted storage, and high shelves to take advantage of the full height of your tiny house. This can help create a sense of spaciousness while providing additional storage and living areas.
- Open Floor Plan: Embrace an open floor plan to create a more spacious and airy feel in your tiny house. This can help make your minimal size living space feel larger and more inviting. Avoid adding unnecessary walls or partitions that could make the space feel cramped.
- Natural Light and Windows: Incorporate plenty of windows and skylights in your tiny house design to maximize natural light and create a bright, open atmosphere. This not only helps make your space feel larger but also provides a connection to the outdoors and can improve your overall well-being.
- Personal Touches: Despite the minimal size, it’s still essential to add personal touches to your tiny house design to make it feel like home. This could include artwork, decorative items, or unique design features that reflect your personality and style.
Select materials and features
The materials and features you choose for your tiny house will play a major role in its overall aesthetic, functionality, and sustainability. Opt for eco-friendly, durable, and energy-efficient materials wherever possible. Additionally, consider incorporating space-saving features such as foldable furniture, built-in storage, and multipurpose appliances. These choices will not only benefit the environment but also enhance the livability and appeal of your tiny house.
When building a tiny house, the materials and features you choose can have a significant impact on the overall cost, durability, and aesthetics of your home. Here is a list of common materials and features used in tiny house construction, along with estimated price ranges. Keep in mind that these costs can vary depending on your location, the specific products you choose, and fluctuations in market prices.
- Framing Materials
- Wood Studs: $1 – $5 per linear foot
- Steel Studs: $3 – $10 per linear foot
- Structural Insulated Panels (SIPs): $7 – $12 per square foot
- Insulation
- Fiberglass Insulation: $0.50 – $1.50 per square foot
- Spray Foam Insulation: $1 – $3 per square foot
- Rigid Foam Board Insulation: $1 – $2 per square foot
- Roofing
- Asphalt Shingles: $2 – $4 per square foot
- Metal Roofing: $3 – $7 per square foot
- Rubber Roofing: $4 – $8 per square foot
- Siding
- Vinyl Siding: $2 – $7 per square foot
- Wood Siding: $3 – $10 per square foot
- Fiber Cement Siding: $4 – $9 per square foot
- Windows
- Vinyl Windows: $150 – $600 per window
- Wood Windows: $200 – $1,000 per window
- Aluminum Windows: $75 – $400 per window
- Doors
- Exterior Doors: $200 – $1,500 per door
- Interior Doors: $50 – $500 per door
- Flooring
- Laminate Flooring: $1 – $5 per square foot
- Engineered Wood Flooring: $3 – $10 per square foot
- Vinyl Plank Flooring: $2 – $7 per square foot
- Cabinetry and Countertops
- Stock Cabinets: $50 – $200 per linear foot
- Custom Cabinets: $150 – $500 per linear foot
- Laminate Countertops: $10 – $30 per square foot
- Solid Surface Countertops: $40 – $80 per square foot
- Plumbing Fixtures
- Basic Faucets: $30 – $100
- High-End Faucets: $200 – $600
- Basic Toilets: $100 – $300
- High-End Toilets: $300 – $1,000
- Appliances
- Compact Refrigerator: $100 – $400
- Full-Size Refrigerator: $400 – $1,500
- Range/Oven: $300 – $2,000
- Washer/Dryer Combo: $800 – $1,500
2. Obtaining Permits and Inspections
The specific requirements will vary depending on your location and the type of tiny house you’re constructing (i.e., on wheels or a permanent foundation). Here’s what you need to know about permits and inspections:
- Mandatory Permits: Some common permits that may be required include building permits, electrical permits, plumbing permits, and zoning permits. Building permits ensure that your construction meets local safety standards and codes, while electrical and plumbing permits verify that these systems are installed correctly and safely. Zoning permits ensure that your tiny house complies with local zoning regulations, such as minimum square footage or setbacks.
- Inspections: Throughout the construction process, you may need to undergo various inspections by local building officials to ensure that your tiny house complies with relevant codes and regulations. These inspections typically include foundation, framing, insulation, plumbing, electrical, and final inspections. Inspectors will verify that your tiny house meets local standards for safety and code compliance.
- Most Expensive Permits: The cost of permits can vary significantly depending on your location and the specific requirements of your project. In general, building permits tend to be the most expensive, with costs ranging from a few hundred dollars to several thousand dollars. Other permits, such as electrical, plumbing, or zoning, may be less expensive but can still add up.
- Additional Costs: Apart from permit fees, you may also need to pay for other costs related to permitting, such as plan review fees, impact fees, or utility connection fees. These costs can vary widely depending on your location and project requirements.
To navigate the permitting and inspection process, it’s essential to research local building codes and regulations in your desired location. This will help you understand the specific requirements for your tiny house project and ensure that you budget for the associated costs. Additionally, working with experienced professionals, such as architects or contractors, can help guide you through the permitting process and ensure compliance with all relevant regulations.
3. Preparing the Site
Before you can begin construction on your tiny house, you’ll need to prepare the site where it will be built. Proper site preparation is essential for creating a stable foundation and ensuring the long-term durability and safety of your tiny house. Here are some key steps involved in site preparation:
- Land Survey: Before you begin any site work, it’s a good idea to have a land survey conducted by a professional surveyor. This will help you determine the exact boundaries of your property, identify any easements or encroachments, and locate any utilities or other obstacles that could impact your construction.
- Clearing and Grading: The first step in preparing your site is to clear any vegetation, debris, or other obstructions. This may involve removing trees, shrubs, or rocks, as well as leveling the ground to create a flat, stable surface for your tiny house. Grading the site properly is crucial to ensure proper drainage and prevent water-related issues, such as flooding or erosion.
- Soil Testing and Compaction: Depending on the type of foundation you’re using for your tiny house, you may need to test the soil on your site to determine its load-bearing capacity and suitability for construction. This can help you identify any potential issues, such as soil instability or the need for additional compaction. If required, you may need to bring in additional fill material to create a stable base for your foundation.
- Utility Connections: As part of your site preparation, you’ll need to plan for any utility connections required for your tiny house. This may include electrical, water, and sewer connections, as well as any other utilities you plan to use. Be sure to consult with local utility providers and obtain any necessary permits for these connections.
- Foundation Preparation: Once your site is cleared, graded, and properly compacted, you can begin preparing for your tiny house foundation. This may involve digging footings or trenches, installing piers or pilings, or constructing a slab or crawl space, depending on the type of foundation you’ve chosen.
- Erosion and Sediment Control: During site preparation and construction, it’s important to implement erosion and sediment control measures to protect your site and surrounding areas from water-related damage. This may involve installing silt fences, erosion control blankets, or other measures to prevent soil erosion and keep sediment contained.
Preparing your site for tiny house construction involves a range of tasks, such as land surveying, clearing and grading, soil testing and compaction, utility connections, foundation preparation, and erosion control. Proper site preparation is crucial to ensure the stability, safety, and longevity of your tiny house. Working with experienced professionals, such as architects, engineers, or contractors, can help guide you through this process and ensure a successful outcome.
4. Framing Your Tiny House
Framing is the process of constructing the structural skeleton of your tiny house, which serves as the basis for all subsequent construction stages. Proper framing is essential for ensuring the stability, safety, and durability of your tiny house. Here are some key steps and considerations when framing your tiny house:
- Choose Framing Materials: The first step in framing your tiny house is to select the appropriate materials for your project. Common framing materials include wood studs, steel studs, and structural insulated panels (SIPs). Each material has its advantages and drawbacks, so consider factors such as cost, strength, insulation, and ease of installation when making your decision.
- Develop a Framing Plan: Before you begin framing, you’ll need a detailed framing plan that outlines the specific dimensions, layout, and components of your tiny house structure. This plan should include information on wall sections, floor systems, and roof framing, as well as any specific details such as window and door openings, headers, or special framing techniques. Working with an architect or experienced contractor can help you create an accurate and comprehensive framing plan. You may need some help from a CNC machining company like cncfirst for any parts needed to be machined.
- Construct the Floor System: Begin your framing by constructing the floor system, which will serve as the base for your tiny house walls and roof. This may involve installing floor joists, subflooring, and insulation, depending on the type of foundation and floor system you’ve chosen.
- Erect the Walls: Once your floor system is in place, you can begin erecting the walls of your tiny house. This typically involves assembling wall sections on the ground, complete with studs, headers, and window and door openings, and then lifting them into place. Be sure to properly brace and secure each wall section as you go, and ensure that they are square and plumb.
- Install Roof Framing: With the walls in place, you can move on to constructing the roof framing for your tiny house. This may involve installing rafters, trusses, or other roof framing components, depending on your chosen roof style and design. Be sure to properly brace and support the roof framing to ensure stability and prevent sagging or other structural issues.
- Sheathing and Weatherproofing: After your tiny house is fully framed, you’ll need to install sheathing (typically plywood or OSB) to cover the exterior walls and roof. This provides additional strength and stability to your structure, as well as a base for siding and roofing materials. Once the sheathing is in place, you should also install a weather-resistant barrier (such as house wrap or roofing felt) to protect your framing and insulation from moisture, air infiltration, and other environmental factors.
5. Installing Plumbing, Electrical, and HVAC Systems
Once your tiny house is framed, you’ll need to install the necessary plumbing, electrical, and heating, ventilation, and air conditioning (HVAC) systems to make your home comfortable and functional. Here’s an overview of each system and some key considerations:
- Plumbing
- Plan Your System: Work with a plumber or contractor to develop a detailed plumbing plan that outlines the locations of fixtures, supply lines, and drain lines. Consider space-saving options, such as wall-mounted toilets and compact sinks.
- Install Pipes and Fixtures: During the rough-in stage, you’ll need to install supply and drain pipes for water and wastewater, as well as any necessary vent pipes. Once your walls and floors are closed up, you can install fixtures like sinks, toilets, showers, and faucets.
- Material Costs: The cost of plumbing materials, such as pipes, fixtures, and fittings, can range from $1,000 to $4,000 or more, depending on the quality and complexity of your system.
- Professional Services:
- Plumber: $45 – $200 per hour
- Plumbing Permit: $50 – $300, depending on the scope of the project and local regulations
- Electrical
- Plan Your System: Develop an electrical plan with an electrician or contractor that includes the locations of outlets, switches, and light fixtures, as well as the layout of wiring and circuit breakers. Ensure that your plan complies with local electrical codes and includes appropriate safety features like GFCI outlets.
- Install Wiring and Devices: During the rough-in stage, you’ll need to install electrical boxes, run wiring, and connect your tiny house to a main electrical panel. After your walls are closed up, you can install switches, outlets, and light fixtures.
- Material Costs: The cost of electrical materials, such as wiring, outlets, switches, and light fixtures, can range from $1,500 to $3,000 or more, depending on the quality and complexity of your system.
- Professional Services:
- Electrician: $50 – $150 per hour
- Electrical Permit: $50 – $500, depending on the scope of the project and local regulations
- HVAC
- Choose Your System: Select an HVAC system that meets your needs for heating and cooling while being energy efficient and suitable for your tiny house’s size. Common options for tiny houses include mini-split systems, radiant floor heating, and portable heaters or air conditioners.
- Install Ductwork and Equipment: During the rough-in stage, you’ll need to install any necessary ductwork, as well as the indoor and outdoor components of your HVAC system. This may involve mounting air handlers, condensers, or other equipment and connecting them to your electrical and plumbing systems.
- Material Costs: The cost of HVAC equipment and materials, such as mini-split systems or radiant floor heating, can range from $2,000 to $7,000 or more, depending on the type, quality, and efficiency of the system you choose.
- Professional Services:
- HVAC Technician: $50 – $150 per hour
- HVAC Permit: $50 – $300, depending on the scope of the project and local regulations
6. Finishing Touches: Interior and Exterior
Once the fundamental systems of your tiny house are in place, the next step is to incorporate the final details that will make it a cozy, fashionable, and practical living space. These final details consist of a blend of interior and exterior components that bring your tiny house to life and create a genuine sense of home. Below is a summary of several essential interior and exterior finishing touches.
Interior Finishes
- Insulation and Drywall: Insulate your tiny house’s walls, floor, and ceiling to ensure energy efficiency and comfort. Then, install drywall or other wall coverings to create a smooth, finished surface for painting or other treatments.
- Flooring: Choose and install the appropriate flooring for your tiny house, such as hardwood, laminate, tile, or carpet. Consider factors such as durability, maintenance, and cost when selecting your flooring material.
- Paint and Wall Treatments: Apply paint or other wall treatments (such as wallpaper or paneling) to your interior walls, and consider adding accent walls or other decorative features to personalize your space.
- Cabinetry and Built-Ins: Install kitchen cabinets, bathroom vanities, and other built-in storage solutions to maximize the functionality of your tiny house. Custom built-ins, such as loft beds, fold-out desks, or convertible furniture, can help you make the most of your limited space.
- Lighting: Install a variety of lighting options, such as recessed lights, pendant lights, and sconces, to create a warm, inviting atmosphere in your tiny house.
Exterior Finishes
- Siding: Choose and install the appropriate siding for your tiny house, such as wood, vinyl, or metal. Consider factors such as durability, maintenance, and aesthetic appeal when selecting your siding material.
- Roofing: Install the roofing material of your choice, such as asphalt shingles, metal roofing, or wooden shakes. Ensure that your roofing is properly installed and sealed to protect your tiny house from water damage and other environmental factors.
- Windows and Doors: Install energy-efficient windows and doors to minimize heat loss and create a comfortable, well-insulated living space.
- Trim and Accents: Add trim, shutters, and other exterior accents to your tiny house to enhance its curb appeal and personalize its appearance.
- Landscaping: Design and install landscaping elements, such as flower beds, walkways, or patios, to create an inviting outdoor living space around your tiny house.
7. Moving In and Embracing Minimalist Living
It’s time to move in and embrace the minimalist lifestyle that tiny house living promotes. This new way of life may require some adjustments and a shift in mindset, but it can lead to a more sustainable, efficient, and fulfilling existence. Here are some tips for moving into your tiny house and embracing minimalist living:
- Declutter and Downsize: Before moving in, take the time to declutter and downsize your possessions. Keep only the essentials and items that genuinely bring value to your life. This process can be challenging, but it will help you make the most of your limited space and focus on what truly matters.
- Organize and Optimize: As you settle into your tiny house, develop an organization system that maximizes the use of your space. Utilize built-in storage solutions, multifunctional furniture, and creative storage hacks to keep your belongings organized and accessible. Invest in the best bedding that is comfortable, durable, and fits well in your tiny house bed to ensure a good night’s sleep.
- Embrace Simplicity: Adopt a minimalist mindset by prioritizing simplicity in your daily life. This might involve reducing your consumption, focusing on experiences rather than material possessions, and finding joy in the small things.
- Be Mindful of Energy and Resource Use: Tiny house living often goes hand-in-hand with eco-consciousness. Be mindful of your energy and resource consumption by using energy-efficient appliances, conserving water, and reducing waste whenever possible.
- Connect with Nature and Community: One of the benefits of tiny house living is the opportunity to connect more closely with nature and your community. Embrace outdoor living by creating inviting outdoor spaces and engaging with your neighbors or fellow tiny house dwellers.
- Continuously Evaluate and Adjust: As you adapt to tiny house living, regularly evaluate your space and possessions to ensure that they still meet your needs and align with your minimalist lifestyle. Be willing to make changes and adjustments as needed to maintain a comfortable and efficient living environment.
Remember that the journey to minimalist living is a continuous process of learning and adaptation, and your tiny house can serve as a catalyst for personal growth, self-discovery, and a deeper connection to what truly matters in life.
As you can see, learning how to build a tiny house is a multifaceted process that requires careful planning, dedication, and a passion for minimalist living. It may seem daunting at first, but I can assure you that the end result is worth every bit of effort. By following these 7 easy steps, you’ll be well on your way to creating a beautiful, eco-friendly, and functional tiny house that reflects your unique personality and values. Happy building!
FAQs
Q: What is the average cost of building a tiny house?
A: The average cost of building a tiny house can range from $30,000 to $60,000 or more, depending on factors such as size, materials, design, and location. Custom-built tiny houses or those with high-end finishes may cost more.
Q: Can I build a tiny house on wheels or a foundation?
A: Yes, tiny houses can be built on either wheels or a permanent foundation, depending on your preferences and local regulations. Building on wheels allows for mobility and flexibility, while a foundation provides a more traditional, stationary home.
Q: What are the most common sizes for tiny houses?
A: Tiny houses typically range from 100 to 400 square feet in size, although there are some smaller and larger options available. The size you choose will depend on your needs, preferences, and local regulations.
Q: Are tiny houses legal in all states?
A: The legality of tiny houses varies by state and municipality. Some areas have specific zoning regulations and building codes that allow for tiny houses, while others may be more restrictive. It’s essential to research your local laws before starting your tiny house project.
Q: What kind of insulation should I use in my tiny house?
A: The type of insulation you choose for your tiny house will depend on factors such as climate, budget, and space constraints. Common options include spray foam, fiberglass, and rigid foam board insulation. Each type has its advantages and disadvantages, so it’s essential to research which option is best for your specific needs.
Q: Can I connect my tiny house to utilities like water and electricity?
A: Yes, tiny houses can be connected to utilities such as water, electricity, and sewer systems. However, many tiny house owners also choose to incorporate off-grid solutions like solar panels, rainwater collection, and composting toilets to minimize their environmental impact and reduce utility costs.
Q: How do I find a suitable location for my tiny house?
A: When searching for a location for your tiny house, consider factors such as local zoning regulations, access to utilities, climate, and proximity to amenities and services. Some tiny house owners choose to purchase or lease land, while others join tiny house communities or park their homes on the property of friends or family members.
Q: What kind of materials should I use to build my tiny house?
A: The materials you choose for your tiny house will depend on factors such as budget, design preferences, and environmental considerations. Common materials include wood, metal, and SIPs (structural insulated panels). It’s important to research the pros and cons of different materials and choose the best option for your specific needs and goals.
Q: Can I build a tiny house myself, or do I need to hire a professional?
A: Building a tiny house can be a DIY project for those with construction experience and the necessary tools. However, if you’re not comfortable with the building process or need help with specialized tasks like plumbing and electrical work, it’s best to hire professionals to ensure your tiny house is safe and well-built.
Q: What are the benefits of living in a tiny house?
A: Tiny house living offers several benefits, including lower living expenses, reduced environmental impact, and a more minimalist, intentional lifestyle. By embracing tiny house living, you can focus on experiences and relationships rather than material possessions and enjoy a simpler, more sustainable way of life.
Discover more from Futurist Architecture
Subscribe to get the latest posts sent to your email.